Hey, Howdy, Bienvenido, Shalom y'all! Welcome to your home for unique nail decorating ideas, inspiration, and tips.
Like many of you, I am just your average gal with a love for cool nail polish and a desire to spice things up a little for a life slightly less ordinary with fun nail art that won't cost a fortune!
I am not a professional cosmetologist or artist, so the work you see actually represents what the average person could do...so when you see the model and then see your completed nails, the two are not light years apart. The fine print: Of course, there are no promises and we know our fine motor skills differ by person, but I don't consider myself to have any more unique abilities than anyone else other than vision and cajones! I hope to see a world full of inspired folks with funky nails in the future!
~The Chick with the Cool Nails
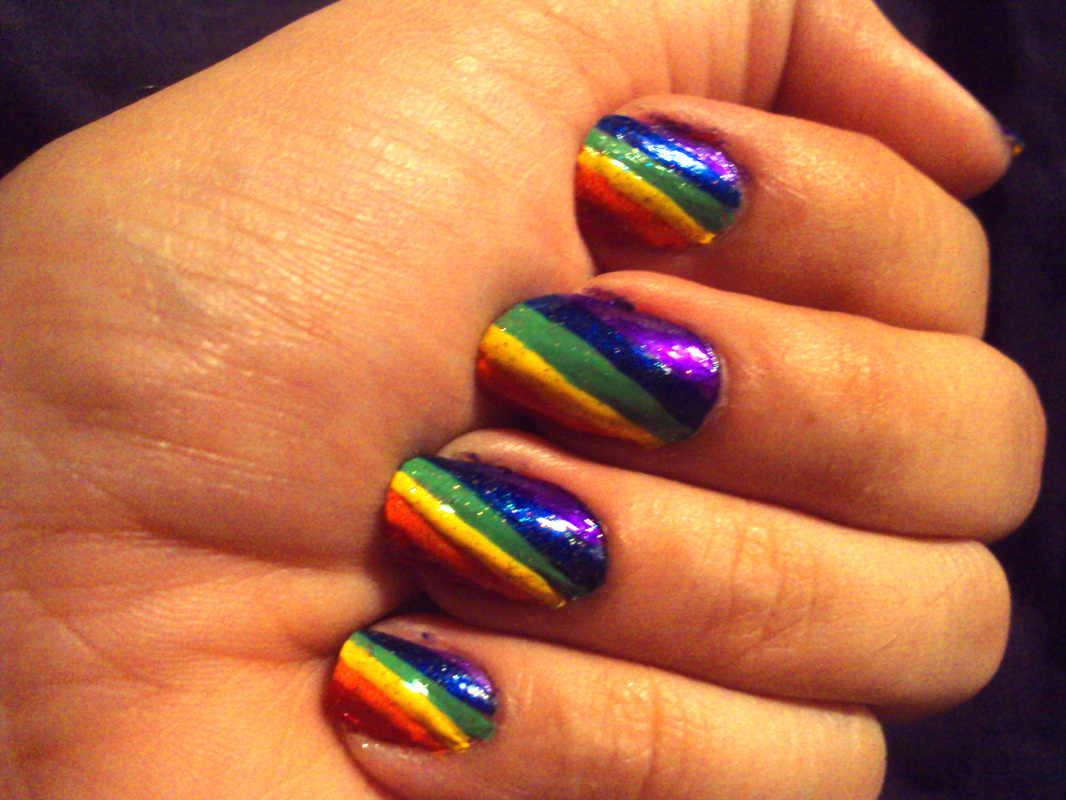
Rainbow Nails
You will need:
Cost: $3-4 per bottle of nail polish, or the cost of your preferred brand
- Base Coat
- Red, Orange, Yellow, Green, Blue, and Purple nail Polish
- Base coat
- A Steady Hand
- Optional: Sparkle polish, nail polish remover, nail file
Cost: $3-4 per bottle of nail polish, or the cost of your preferred brand
Step 1: Select your rainbow nail polish colors: Red, Orange, Yellow, Green, Blue, and Purple. I use a mix of different polishes, but find KISS brush-on Nail Art Paint to be the best for keeping straight, skinny lines. I do use other varieties of regular polish depending on what color I want my rainbow.
Step 2: Clean off your nails with your preferred nail polish remover. (It also may help to have filed them to the shape you want them 1st).
Step 3: Apply a base coat to keep your nails from staining.
Step 4: Start at the top right corner of your nails and make a diagonal line with the red polish (it is sort of like an oblong triangle shape for the corner pieces).
Step 5: Apply the orange polish in a diagonal strip along the right side of the red stripe. *Be sure to hold very still and not have anyone bump you or the seat you are sitting on. It works best to do the stripe fast in a sweeping motion, provided you have enough (but not too much polish) on the brush. If you notice the lines are too thick or globbing, then make sure to wipe the brush on the container and check to make sure there are no rolling drips coming down the brush or cap.
Step 6-9: Repeat step 5 with remaining colors in rainbow order.
Step 10: Go back over any lines again that you felt were too thick, thin, or sloppy to straighten them out with a second coat of paint. Some nails may not need any, some may need a lot of help ;)
Step 11: Now the hard part: Holy crap, you've gotta sit there and wait for them to dry completely without touching anything or falling asleep on them and risk finding imprints of your hair or blankets in them in the morning!
Step: 12: Add a final top coat, but wait until they are dry or you will risk smudging your lines together.
Optional step 13: add a coat of tiny, thin coated clear sparkle polish on top for some extra pizzazz. Use with caution though, too much sparkle takes away from your rainbows.
Step 14: Now that everything is dry. Look at your nails. Smile. Now, go show them off!
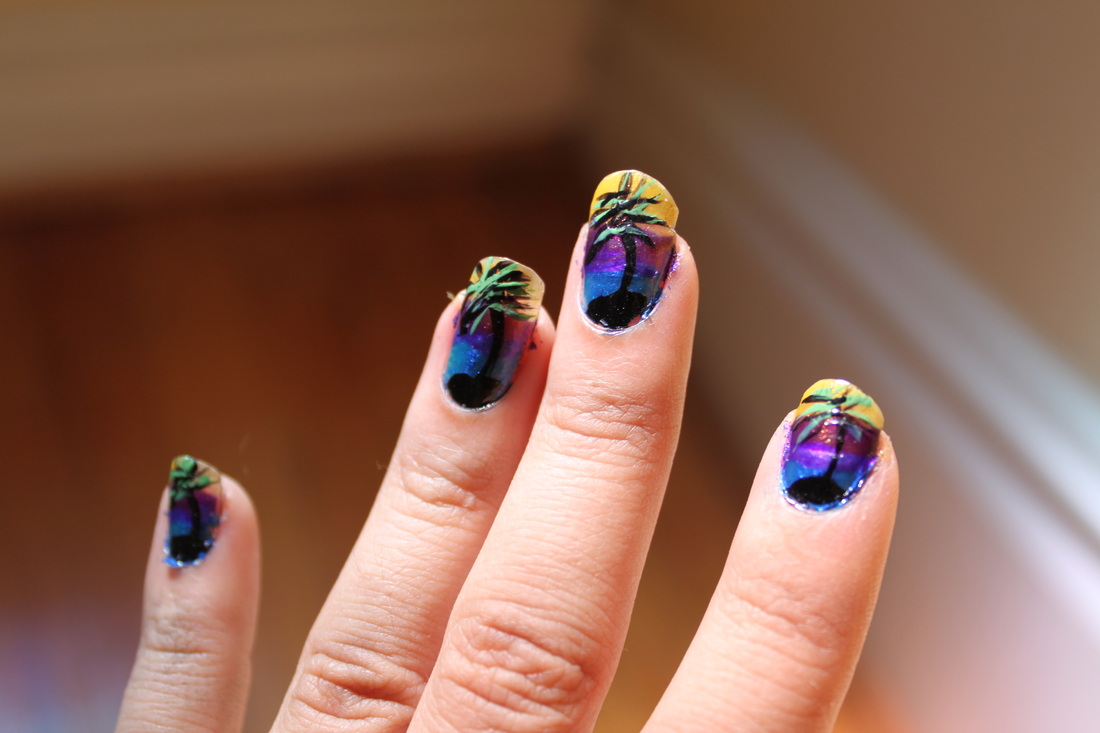
Island Sunset nails
What you will need:
Cost: $3-4 for each bottle of polish, or use your preferred brand.
- Nail polish- black, blue, purple, yellow (semi-transparent preferred), green, or your own variety
- Base coat
- Top coat
- Optional: nail polish remover, nail file
Cost: $3-4 for each bottle of polish, or use your preferred brand.
Step 1: Select your colors.
Step 2: Paint the lower 1/3 of your nails blue in a thick horizontal stripe. *Note: If you want your canvas facing outward for others to see, do the reverse so the top of the nails are blue.
Step 3: Paint the middle 1/3 of your nails purple in a thick horizontal stripe
Step 4: Paint the top 1/2 of your nails yellow...yes, this means you are covering up the top part of the purple with the yellow polish so the colors blend together.
Step 5: Wait 5 minutes for the other paint to dry
Step 6: Using your Kiss nail art brush or a small paint brush and black nail polish, paint a black half circle or mound on the lower portion of your nails, coming from your nails beds. This is your island base.
Step 7: Draw a bent black line coming out of the black mound stopping 2/3 up the nail. This is your palm tree trunk.
Step 8: Using your black nail art brush, draw in your palm tree leaves with thin black lines sweeping out in all directions from the top of the trunk.
Step 9: Using a green colored nail art brush, draw more sweeping palm leaves in to accent the color.
Optional step: If you have enough room left on your canvas, you can draw in birds flying in the sunset by a making a V.
Step 10: OMG, now you've got to wait for them to dry and not touch anything! Try your best to bare the torture, it will be worth it!
Step 11: Once dried, apply the top coat to seal your work. *Tip: Don't get too antsy, wait until they are dry or the brush or chemicals of the top coat will smudge your beautiful work!
Mod Black & White Striped Nails
Step 1: Remove old polish from nails, and file them to desired shape
Step 2: Select your paints -black and white polishes
Step 3: Add a base coat to your nails
Step 4: Paint your entire nails with black polish
Step 5: With a paintbrush or Nail Art polish, paint long thin diagonal stripes with your white polish.
Step 6: Allow the paint to dry a bit, then touch up any flaws by going over the lines again with altering black or white polish with the paint brush or art brush to get the desired look.
Step 7: Again, the waiting....tick tock tick tock
Step 8: Add your quick dry top coat
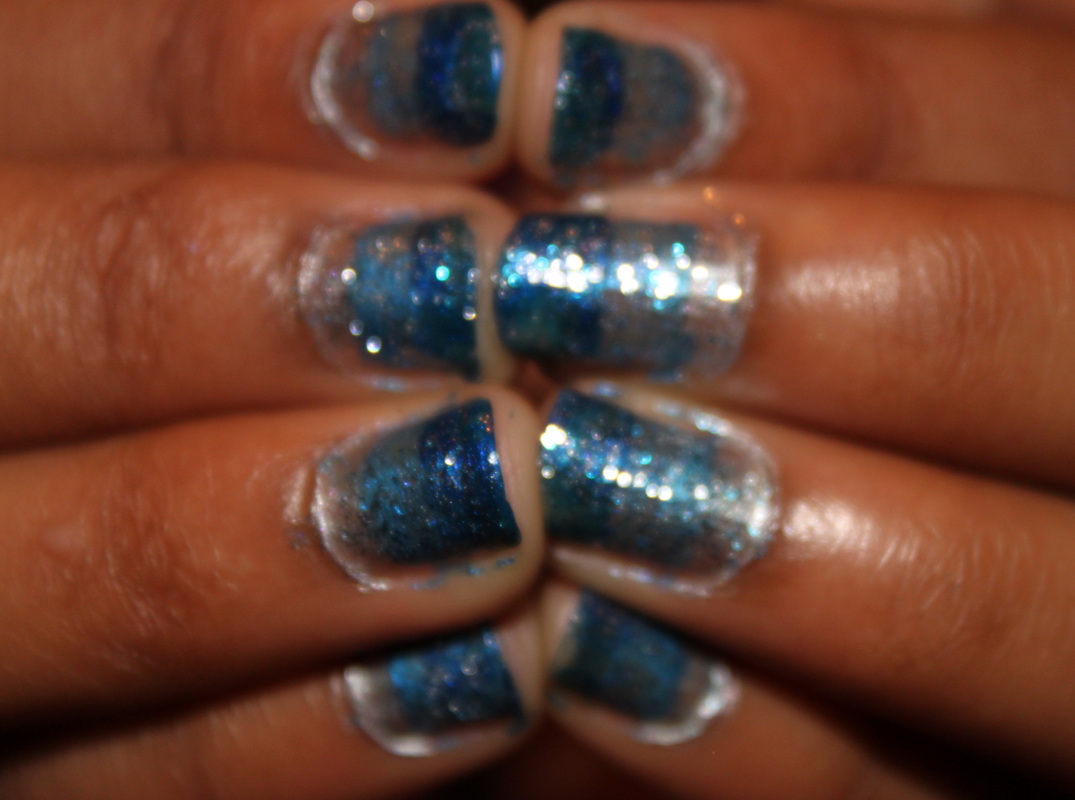
Ombre Blue Nails
What you will need:
Cost: $1-8 for each bottle of polish, or use your preferred brand.
Step 1: Remove old polish from your nails and file then to desired shape
Step 2: Select your colors
Step 3: Apply your base coat
Step 4: Paint the bottom 1/3 of your nail silver
Step 5: Paint the middle 1/3 of your nail light blue, going over the top edge of the silver slightly
Step 6: Paint the top 1/3 of your nail in a dark blue, going over the edge of the middle layer slightly so they blend
Step 7: Allow a few minutes to dry, then apply silver/blue sparkle polish over the top
Step 8: Wait a few more minutes to dry, then apply top coat
- Nail polishes of similar color, but varying gradients: silver, light blue, dark blue, and blue& silver sparkle polish
- Base coat
- Top coat
- Optional: nail polish remover, nail file
Cost: $1-8 for each bottle of polish, or use your preferred brand.
Step 1: Remove old polish from your nails and file then to desired shape
Step 2: Select your colors
Step 3: Apply your base coat
Step 4: Paint the bottom 1/3 of your nail silver
Step 5: Paint the middle 1/3 of your nail light blue, going over the top edge of the silver slightly
Step 6: Paint the top 1/3 of your nail in a dark blue, going over the edge of the middle layer slightly so they blend
Step 7: Allow a few minutes to dry, then apply silver/blue sparkle polish over the top
Step 8: Wait a few more minutes to dry, then apply top coat
Sparkling Nebula Nails
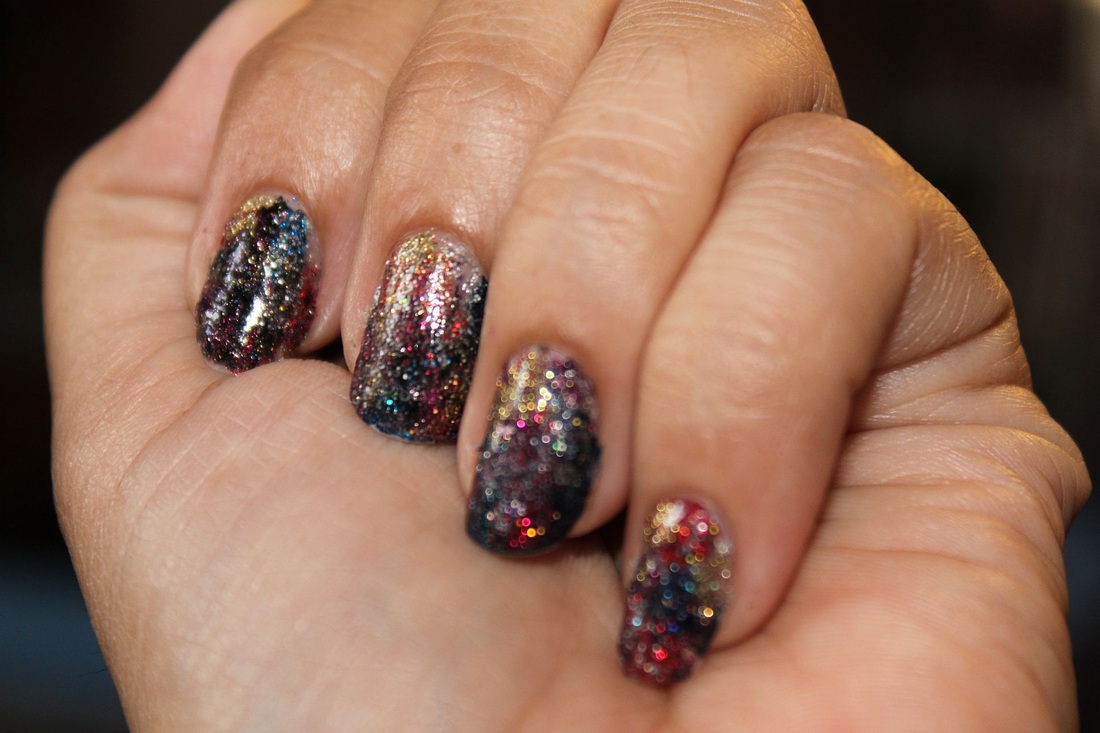
Were you wondering what to do with the extra lumpy, partially dried out glitter nail polish in your bottles? Here's your answer: Nebula Nails.
What you will need:
Cost: $1-8 for each bottle of polish, or use your preferred brand.
Step 1: Remove old polish from your nails and file then to desired shape
Step 2: Select your colors
Step 3: Apply your base coat
Step 4: Using a paint brush, dig out chunks of your remaining goopy, but not completely hardened glitter nail polish from the bottom of your bottle and apply chunks to your nails in various spots. The more colors, the better!
Step 5: repeat with various colors onto empty spaces of nails
Step 6: Apply a good top coat. It's ok if the colors blend, so you can apply the top coat before the other colors are dried, this will create a smoother texture over the top and blend the colors together. Note: this may get polish on your top coat brush.
Step 7: Allow to dry. Since the polish is thicker, drying time will take longer.
What you will need:
- Various glitter nail polishes
- Base coat
- Top coat
- small paint brush
- Optional: nail polish remover, nail file
Cost: $1-8 for each bottle of polish, or use your preferred brand.
Step 1: Remove old polish from your nails and file then to desired shape
Step 2: Select your colors
Step 3: Apply your base coat
Step 4: Using a paint brush, dig out chunks of your remaining goopy, but not completely hardened glitter nail polish from the bottom of your bottle and apply chunks to your nails in various spots. The more colors, the better!
Step 5: repeat with various colors onto empty spaces of nails
Step 6: Apply a good top coat. It's ok if the colors blend, so you can apply the top coat before the other colors are dried, this will create a smoother texture over the top and blend the colors together. Note: this may get polish on your top coat brush.
Step 7: Allow to dry. Since the polish is thicker, drying time will take longer.
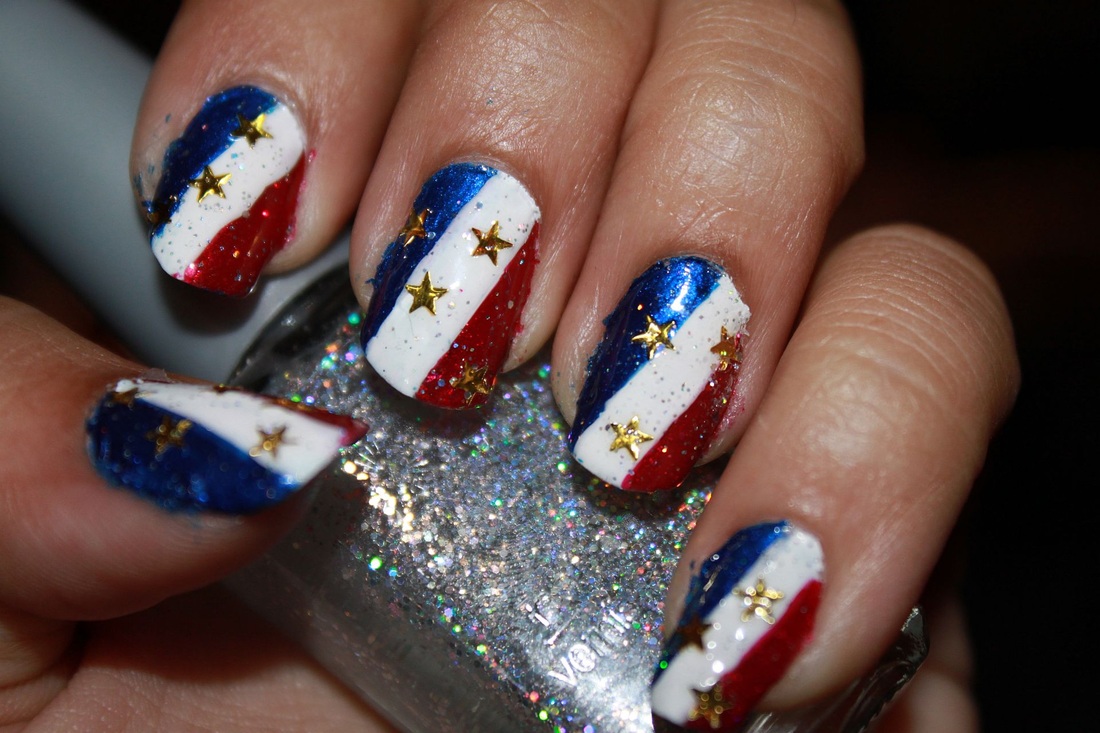
4th of July stars & stripes nails
What you will need:
Cost: $1-8 for each bottle of polish plus $4 for sequins, or use your preferred brand.
Step 1: Remove old polish from your nails and file then to desired shape
Step 2: Select your colors
Step 3: Apply your base coat
Step 4: Using your white nail polish, make a diagonal line across the middle of your nail to the desired thickness. You may need to go over this a couple times so the white is thick and solid.
Step 5: apply the red polish in a diagonal stripe alongside the white line. Repeat if the polish is too thin or to correct errors in your lines.
Step 6: Apply the blue polish in a diagonal line on the last remaining portion of the nail, repeating the earlier steps.
Step 7: No go back over your lines, touching them up so they are solid and straight. It may help to use a nail art brush for this.
Step 8: Go over nails with a clear, thin glitter polish.
Step 9: Apply gold sequins as desired to nails by immediately sticking into wet polish and pressing down with your nail or using a cuticle stick. In some cases you can find nail polish that already has the sequin stars in it, which you can use to coat the nails.
Step 10: Apply a good quick dry top coat to the nails
Step 11: Allow to dry. Since the polish is thicker, drying time will take longer.
- Red, white, blue, and glitter nail polishes
- gold sequin nail decorations
- Base coat
- Top coat
- cuticle stick
- Optional: nail polish remover, nail file
Cost: $1-8 for each bottle of polish plus $4 for sequins, or use your preferred brand.
Step 1: Remove old polish from your nails and file then to desired shape
Step 2: Select your colors
Step 3: Apply your base coat
Step 4: Using your white nail polish, make a diagonal line across the middle of your nail to the desired thickness. You may need to go over this a couple times so the white is thick and solid.
Step 5: apply the red polish in a diagonal stripe alongside the white line. Repeat if the polish is too thin or to correct errors in your lines.
Step 6: Apply the blue polish in a diagonal line on the last remaining portion of the nail, repeating the earlier steps.
Step 7: No go back over your lines, touching them up so they are solid and straight. It may help to use a nail art brush for this.
Step 8: Go over nails with a clear, thin glitter polish.
Step 9: Apply gold sequins as desired to nails by immediately sticking into wet polish and pressing down with your nail or using a cuticle stick. In some cases you can find nail polish that already has the sequin stars in it, which you can use to coat the nails.
Step 10: Apply a good quick dry top coat to the nails
Step 11: Allow to dry. Since the polish is thicker, drying time will take longer.
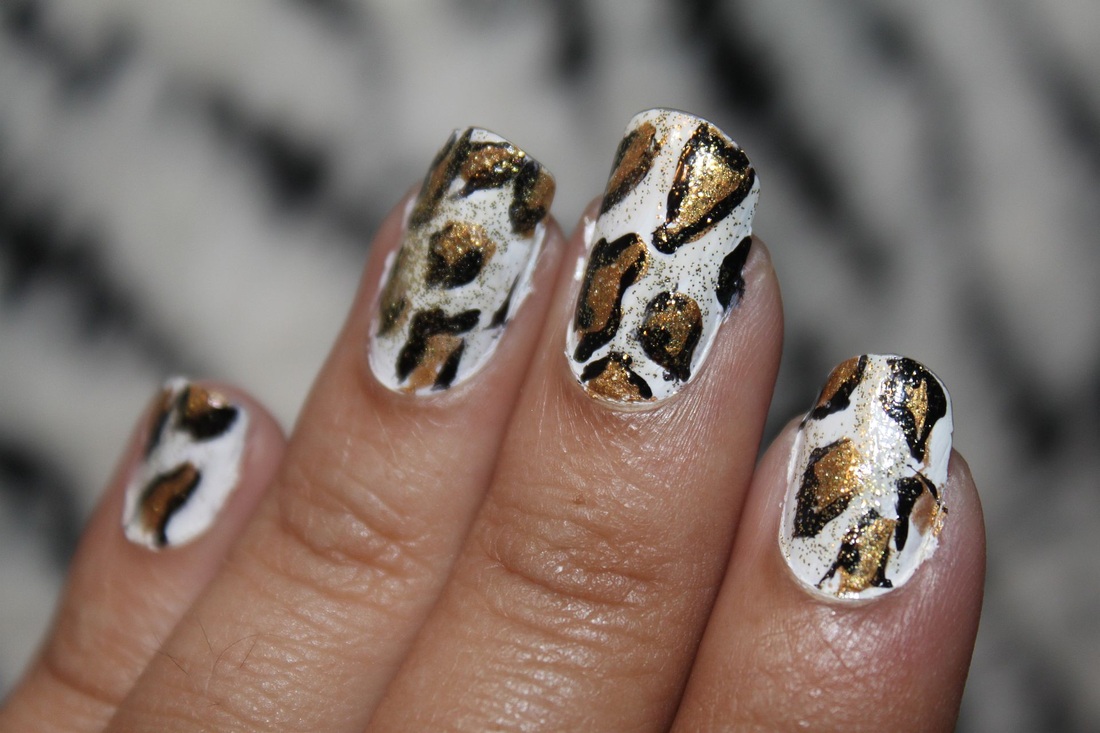
Leopard Print Nails. Meow.
What you will need:
Cost: $1-8 for each bottle of polish
Step 1: Remove old polish from your nails and file then to desired shape
Step 2: Select your colors
Step 3: Apply your base coat
Step 4: Using your white nail polish, cover nails completely.
Step 5: Apply the gold nail polish in odd shaped globs and smears around the nails (3-8 per nail depending on length)
Step 6: Now take a black nail art brush (I use KISS brand nail art brushes or will dip a tiny paint brush into the regular black polish bottles)and trace the globs in a rough and jagged pattern. With some of them, you may only want to trace partially.
Step 7: Allow the nails to dry for a few minutes
Step 8: Go over nails with a clear, thin gold glitter polish to make them pop
Step 9: Apply a good quick dry top coat to the nails
Step 10: Allow to dry. Now put on your best animal print outfit and hit the town you sexy beast!
- Gold, white, black (with nail art brush), and gold glitter nail polishes
- Base coat
- Top coat
- Optional: nail polish remover, nail file
Cost: $1-8 for each bottle of polish
Step 1: Remove old polish from your nails and file then to desired shape
Step 2: Select your colors
Step 3: Apply your base coat
Step 4: Using your white nail polish, cover nails completely.
Step 5: Apply the gold nail polish in odd shaped globs and smears around the nails (3-8 per nail depending on length)
Step 6: Now take a black nail art brush (I use KISS brand nail art brushes or will dip a tiny paint brush into the regular black polish bottles)and trace the globs in a rough and jagged pattern. With some of them, you may only want to trace partially.
Step 7: Allow the nails to dry for a few minutes
Step 8: Go over nails with a clear, thin gold glitter polish to make them pop
Step 9: Apply a good quick dry top coat to the nails
Step 10: Allow to dry. Now put on your best animal print outfit and hit the town you sexy beast!
Jackson Pollock Abstract Art Nails

What you will need:
Cost: $1-8 for each bottle of polish
Step 1: Remove old polish from your nails and file then to desired shape
Step 2: Select your colors
Step 3: Apply your base coat
Step 4: Using your silver chrome nail polish, cover nails completely.
Step 5: Apply sloppy streaks of your chosen color in various directions
Step 6: Repeat step 5 with the other colors, using different colors and brushes. It works best if you don't have much polish on the brush and do the streaks fast and light.
Step 7: Allow the nails to dry for a few minutes
Step 8: Go over nails with your chosen glitter polish to make them pop
Step 9: Apply a good quick dry top coat to the nails
Step 10: Allow to dry. Look at your nails and be proud of your work.
- Silver chrome polish, various bright colored polishes, and glitter nail polish
- Base coat
- Top coat
- Optional: nail polish remover, nail file
Cost: $1-8 for each bottle of polish
Step 1: Remove old polish from your nails and file then to desired shape
Step 2: Select your colors
Step 3: Apply your base coat
Step 4: Using your silver chrome nail polish, cover nails completely.
Step 5: Apply sloppy streaks of your chosen color in various directions
Step 6: Repeat step 5 with the other colors, using different colors and brushes. It works best if you don't have much polish on the brush and do the streaks fast and light.
Step 7: Allow the nails to dry for a few minutes
Step 8: Go over nails with your chosen glitter polish to make them pop
Step 9: Apply a good quick dry top coat to the nails
Step 10: Allow to dry. Look at your nails and be proud of your work.
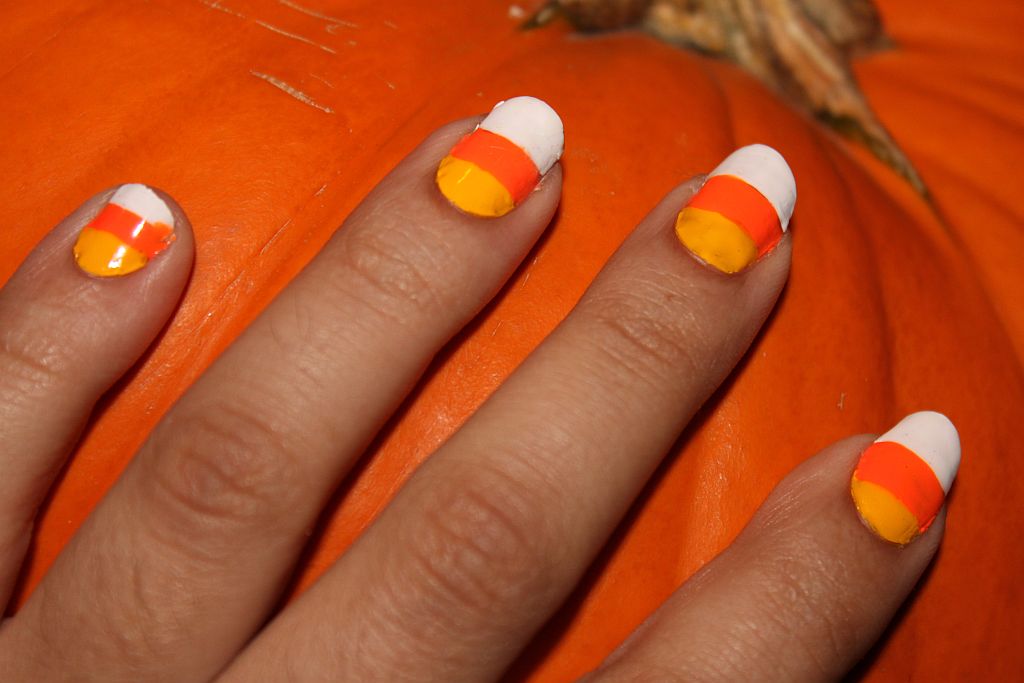
Candy Corn Halloween Nails
What you will need:
Cost: $1-8 for each bottle of polish
Step 1: Remove old polish from your nails and file then to desired shape
Step 2: Select your colors
Step 3: Apply your base coat
Step 4: Using your yellow nail polish, paint the lower 1/3 of your nails.
Step 5: Apply orange nail polish stripe across middle 1/3 of nail
Step 6: Apply white nail polish across remaining tip of nail
Step 7: Allow the nails to dry for a few minutes
Step 8: Apply a good quick dry top coat to the nails
Step 9: Now put on your costume and work it baby!
- Orange, white, and yellow nail polish
- Base coat
- Top coat
- Optional: nail polish remover, nail file
Cost: $1-8 for each bottle of polish
Step 1: Remove old polish from your nails and file then to desired shape
Step 2: Select your colors
Step 3: Apply your base coat
Step 4: Using your yellow nail polish, paint the lower 1/3 of your nails.
Step 5: Apply orange nail polish stripe across middle 1/3 of nail
Step 6: Apply white nail polish across remaining tip of nail
Step 7: Allow the nails to dry for a few minutes
Step 8: Apply a good quick dry top coat to the nails
Step 9: Now put on your costume and work it baby!
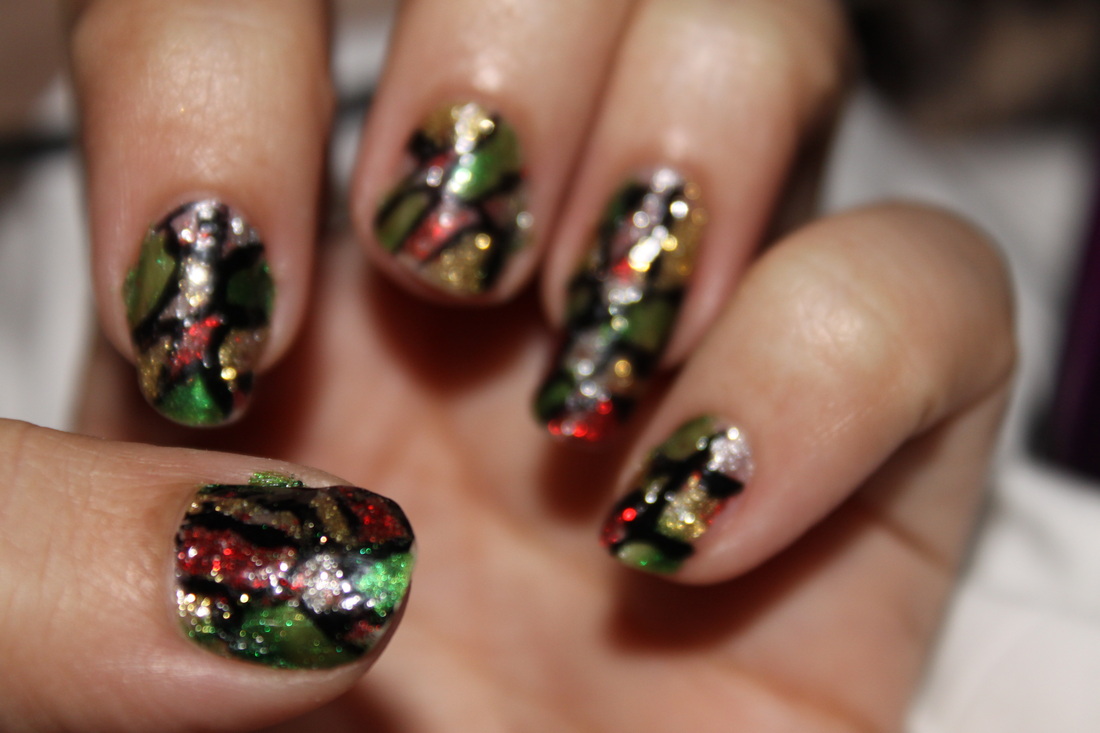
Stained Glass Holiday Nails
What you will need:
Cost: $1-8 for each bottle of polish
Step 1: Remove old polish from your nails and file then to desired shape
Step 2: Select your colors
Step 3: Apply blotches of red glitter polish, leaving plain gaps of space around the blotches
Step 4: Apply silver blotches in some empty gaps on nail
Step 5: Apply gold blotches in empty gaps between other colors
Step 6: Apply green glitter blotches in remaining gaps of nail
Step 7: Using your fine tip brush and black polish, trace each glittery glop with a fine black line, which should separate each color on the nail.
Step 8: Wait a few minutes for the nails to dry.
Step 9: Apply a good quick dry top coat to the nails
- Holiday colored dense glitter nail polish, and black polish with a fine brush
- Top coat
- Optional: nail polish remover, nail file, base coat
Cost: $1-8 for each bottle of polish
Step 1: Remove old polish from your nails and file then to desired shape
Step 2: Select your colors
Step 3: Apply blotches of red glitter polish, leaving plain gaps of space around the blotches
Step 4: Apply silver blotches in some empty gaps on nail
Step 5: Apply gold blotches in empty gaps between other colors
Step 6: Apply green glitter blotches in remaining gaps of nail
Step 7: Using your fine tip brush and black polish, trace each glittery glop with a fine black line, which should separate each color on the nail.
Step 8: Wait a few minutes for the nails to dry.
Step 9: Apply a good quick dry top coat to the nails
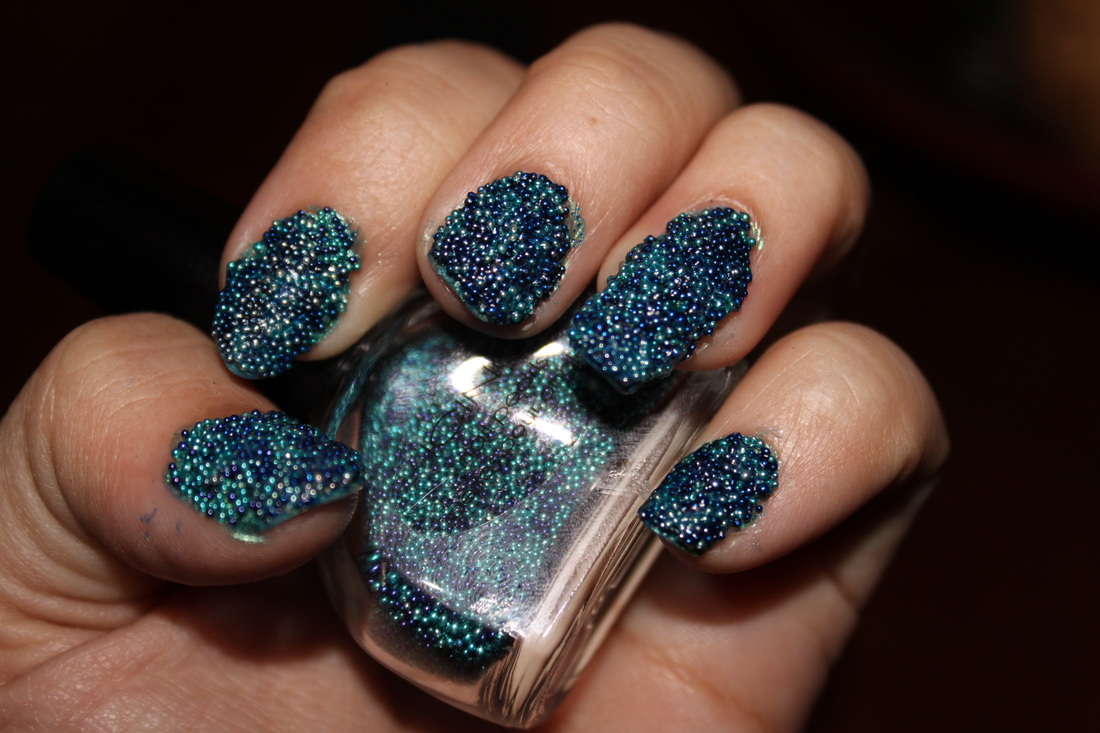
Textured Pearl Nails
What you will need:
Cost: $14 for a pearl nail kit (can be purchased from The Icing or ebay)
Step 1: Remove old polish from your nails and file then to desired shape
Step 2: Select your colors
Step 3: Apply 2 coats of your selected polish
Step 4: While nails are still tacky, pour mini caviar pearls over the nails
Step 5: Press pearls firmly into nails
Step 6: Apply clear top coat
Step 7: Fill in an extra gaps with additional pearls if necessary and press into nails
Step 8: Wait a few minutes for the nails to dry.
Step 9: Now go strut your stuff because you look fabulous!
- Mini pearl beads
- Matching polish
- Top coat
- Optional: nail polish remover, nail file, base coat
Cost: $14 for a pearl nail kit (can be purchased from The Icing or ebay)
Step 1: Remove old polish from your nails and file then to desired shape
Step 2: Select your colors
Step 3: Apply 2 coats of your selected polish
Step 4: While nails are still tacky, pour mini caviar pearls over the nails
Step 5: Press pearls firmly into nails
Step 6: Apply clear top coat
Step 7: Fill in an extra gaps with additional pearls if necessary and press into nails
Step 8: Wait a few minutes for the nails to dry.
Step 9: Now go strut your stuff because you look fabulous!
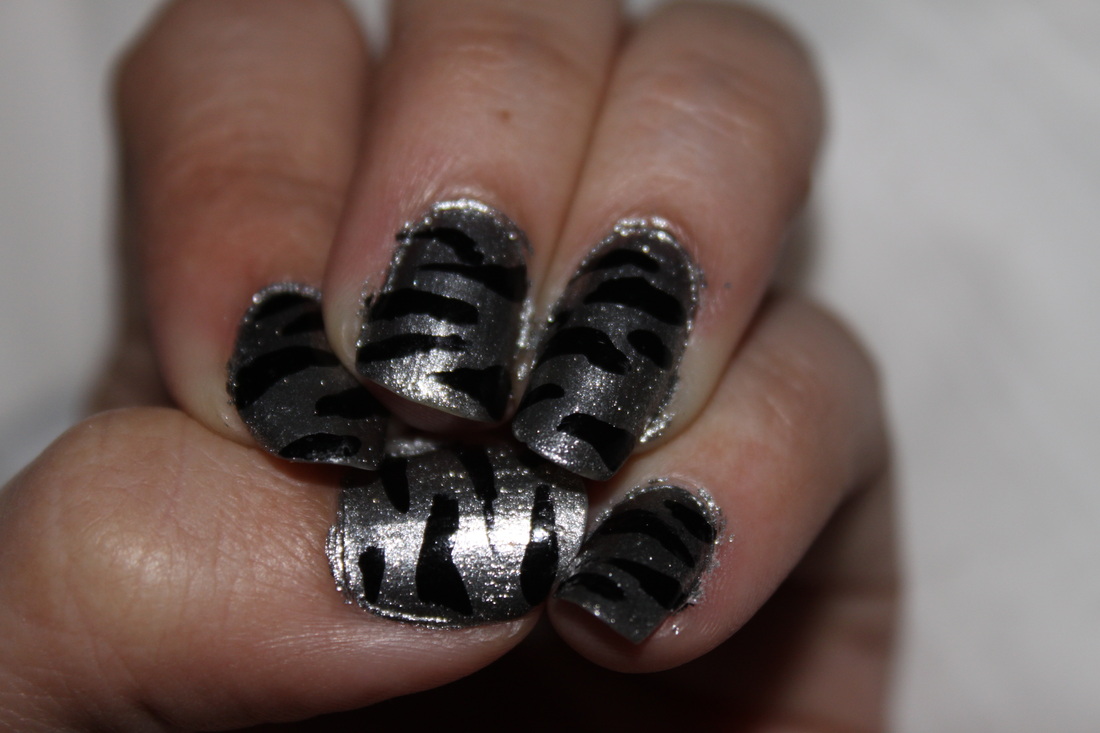
Zebra Nails
What you will need:
Cost: $5
Step 1: Remove old polish from your nails and file then to desired shape
Step 2: Select your colors
Step 3: Apply a coat of silver polish
Step 4: Using the black polish brush, paint sloppy triangles across the nails of varying lengths and width
Step 5: allow to dry slightly
Step 6: Apply clear top coat
Step 7: Now strut! Meeow!
- silver polish
- black polish with art brush
- Optional: nail polish remover, nail file, base coat
Cost: $5
Step 1: Remove old polish from your nails and file then to desired shape
Step 2: Select your colors
Step 3: Apply a coat of silver polish
Step 4: Using the black polish brush, paint sloppy triangles across the nails of varying lengths and width
Step 5: allow to dry slightly
Step 6: Apply clear top coat
Step 7: Now strut! Meeow!
